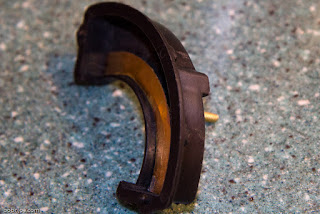
I had already removed the original contacts and used the Dremel to smooth the inner face. I countersunk a hole that was already in the shell for one of the removed terminals.
I cut a small piece of the brass sheet to work with, and using the grinder and smaller tools I made a brass arc that fits the smaller radius of the switch case. Then I attached a "terminal" by soldering a screw to the back of the arc. That was fun. I had a heavy steel plate I set on the stove. Then I set the arc on the plate and the screw in the approximate position to line up with the terminal hole in the shell. Turned the stove burner on and then melted a little pool of solder around and under the screw head on the arc. I could nudge the arc off the edge of the plate and carefully pick it up with pliers and let it cool. Then insert it into the shell to see if the terminal lined up with the hole. It took three tries to get it right.
The arc isn't perfect, but it fits well enough. It doesn't need to be perfect, just has to stay in contact with the bottom half of the slider.
Here you can kind of see how the terminal goes through the shell and out the back. This was a test fit before I epoxied it in.
I used epoxy so the brass strip would not flex and stress the solder joint with the terminal. I put a nut on the back side of the terminal and snugged it. It can stay there and I'll have securing nuts on each of the screw terminal contacts. An outer nut will hold the attached wire to the indicator and relays.


No comments:
Post a Comment